Hi Stampers!
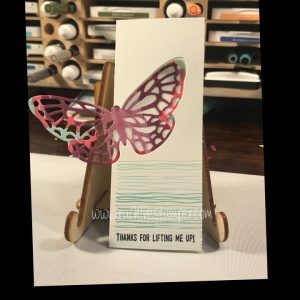
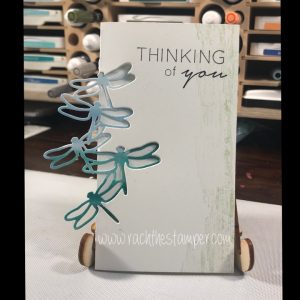
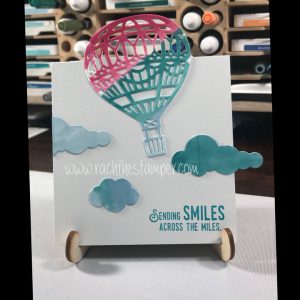
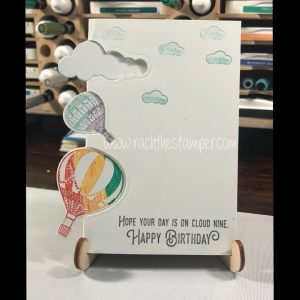
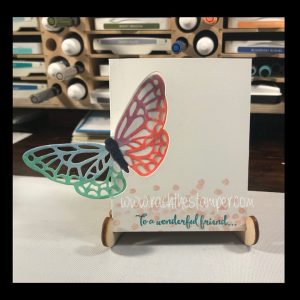
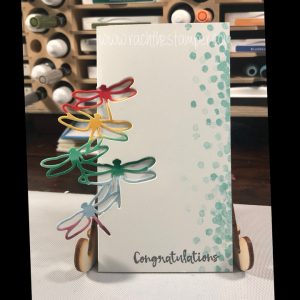
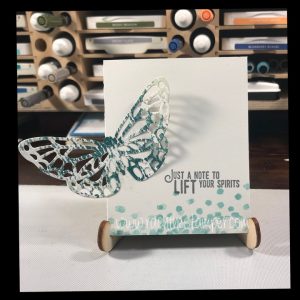
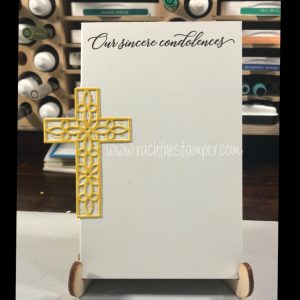
We used lots of different dies today to make some off the edge cards that look so much more amazing than I dreamed they would!
I did them two different ways and really it does help to see the video to understand visually how to place the cutting plates to only cut part of them, however I know I have a viewer who needs better directions since she is hearing impaired so I will do MY VERY BEST to make them seem sensible to understand!
I tried kind of the opposite way that Jennifer McGuire showed in her videos….I guess I did it the “Rach” way LOL.
You can also make your own envelopes so you do not have to trim your cards down as I did, but you can also trim to the edge of whatever your car needs to be. Ex. put the edge of the butterfly wing at 4 1/4″ and trim the other end to make sure it is a 4 1/4″ by 5 1/2″ card and will fit in a standard envelope.


You will need certain supplies to be able to make these cards, some are necessary and some will make it simpler:
- Big Shot or other die cutting machine with cutting pads
- T Square Ruler
- Pencil
- Bone Folder
- Stampin’ Trimmer or other scoring device ( Simply Scored or another scoring device will work as well)
- Thick Whisper White card stock for base and parts you may add, you may use another color, I liked how white accented everything
- PATIENCE, you may not get it right the first time, but I know you will try again and Love it, so don’t give up, just be kind to yourself
CARD RECIPE
You will need to start with either a 4 1/4″ by 11″ base (TALL) or a 5 1/2″ by 8 1/2″ base(WIDE). I will give directions for both below:
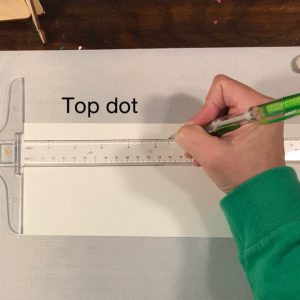
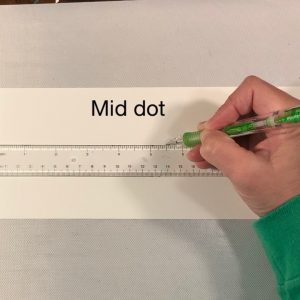
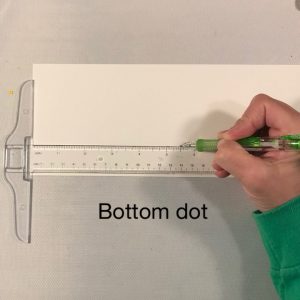
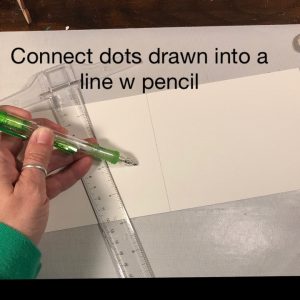
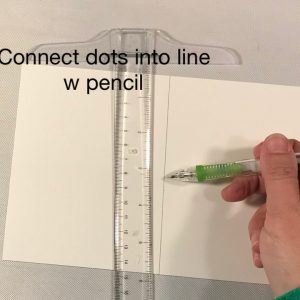
TALL- on the 11″ side, you will place your T-Square ruler across the long side, near the top (about 1/2″ down) and make a small pencil mark, you can do one again at about mid-way and finally one closer to the bottom. You will then move the ruler to the dots you’ve made( crosswise to how you just were or UP & Down) and draw a small light line connecting them. This will be where you place your die in the middle of the line to achieve your partial die cut. More info to follow after WIDE instructions below.
WIDE-on the 8 1/2″ side, you will place your T-Square ruler across the short side, near the top (about 1/2″ down) and make a small pencil mark, you can do one again at about mid-way and finally one closer to the bottom. You will then move the ruler to the dots you’ve made( crosswise to how you just were or Up & Down) and draw a small light line connecting them. This will be where you place your die in the middle of the line to achieve your partial die cut.
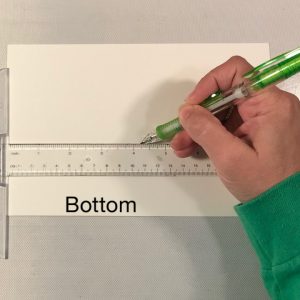
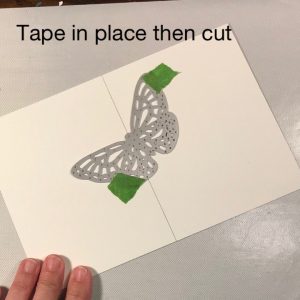
Once you have made your line, you will choose your die and lay it down the middle, I would suggest on your first cards to keep them more to the right to not cut too much and have a hard time with folding, cutting etc. you can add Washi, Post it or painters tape to hold in place where you want it.
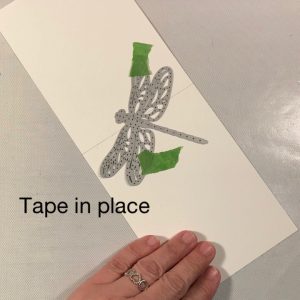
What you will then do is up to you, you can either:
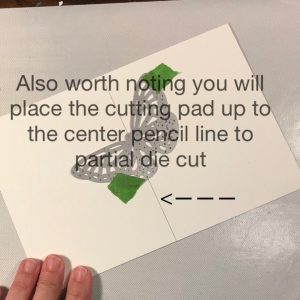
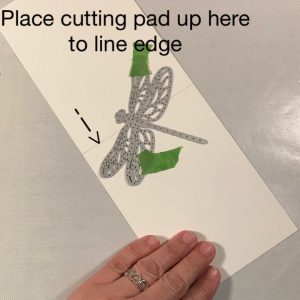
- Place the prepared base with die onto your Big Shot and lay the top cutting plate at the line you made. You will notice it cuts JUST TO THE EDGE, so you may need to go back and make a slight recut adjustment.
- Place the prepared base with die onto your Big Shot UPSIDE DOWN, then lay the top cutting plate at the line you made. You will notice it cuts JUST TO THE EDGE, so you may need to go back and make a slight recut adjustment.
- Depending on which way you go, you will need to trim off either the extra die image, ex the butterfly wing or leave it attached and you can lay an additional matching image on top of it. I know this sounds confusing, but it makes sense when you see it, so maybe follow along on the video. (This starts at 22 minute mark)
You can either color the same image you used but choosing DSP or colored card stock or you can use Thick Whisper White cs and color it with either Stampin’ Blends or the Stampin’ Write markers. I think they all turned out so beautifully. I kept the cross card simple by making it a sympathy card and just adding a sentiment, you could add more or change it as well!
Hope this post was helpful and if you have questions please feel free to ask!
Until next time,
Stay Crafty!
XO Rach
Product List


Amazon Affiliate Links:
The following are Amazon Affiliate links, which means at no additional cost to you, I earn a small percentage of each sale from the link if you purchase.
I only post links I believe in and use personally. I also purchase these items MYSELF and do not use them because they were free, they indeed WERE NOT.


Social Media Links
Follow me on Facebook!
Follow me onInstagram
Check out some great Pins
Shopwith me
Blogwith me
Chat with me at Rachthestamper@gmail.com
Love these cards
Love the color combos
Just found you and love you
You’re inspiring me to get back into stamping!